social

Make an Up-cycled Gift Box

December 26, 2018

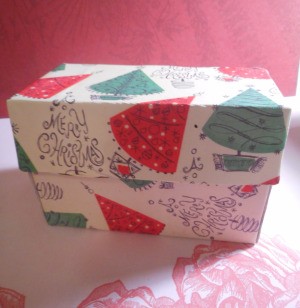
Up-cycled Gift Box - Christmas paper covered tea box, to use as a gift boxThis used to be a tea box! I first made these when I was dead broke and in a pinch to help out with a family Christmas. Someone on ThriftyFun had once posted about re-using a sugar bag for sugar cookies, which got the gears turning. So many possibilities! Since then, making these has become less a matter of necessity and more a matter of being kinder to the Earth. A labor of love.

Advertisement

Total Time: about 1 1/2 hr to assemble (There's a lot of wait time. You should multitask.)

Supplies:

  • empty tea box
  • 2 sheets sturdy 12x12 in craft paper
  • glue
  • paintbrush with rectangular tip
  • scissors
  • craft knife/box cutter
  • newspaper or paper bag to keep your table clean

Steps:

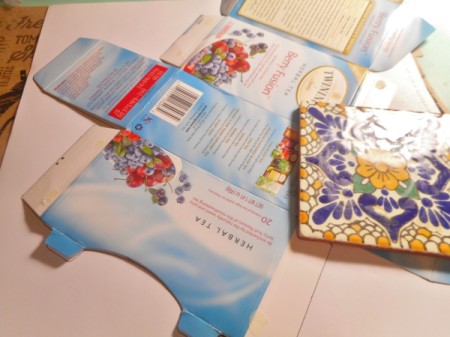
  1. Gently take apart the box. Use the craft knife to break apart the glue seals. This helps prevent the paper from tearing.
  2. Up-cycled Gift Box - disassemble the box, using the craft knife to open the glued joints
     
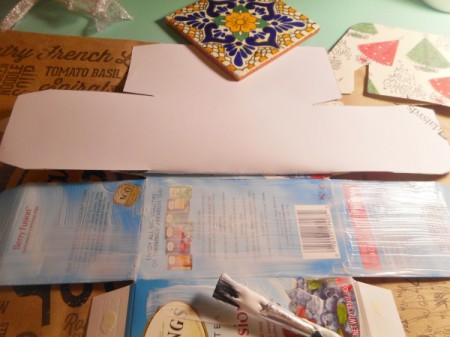
  3. Lay the box down on the blank side of a sheet of craft paper and start tracing around the edges. You will want a paperweight. I used a tile coaster to keep it secure while I traced.
  4. Up-cycled Gift Box - place the box on the blank side of a piece of craft paper and trace, use a weight if needed
     
  5. The box will probably extend past the paper. Just stop at the last seam, draw a line across, and trace the remaining shape on the other piece of craft paper.
  6. Up-cycled Gift Box - if box is too large, mark the end of the craft paper on the box and continue on another piece of craft paper
     
    Up-cycled Gift Box - tracing of the extended area
     
    Advertisement

  7. Cut out the shapes. To glue, brush glue over the box like a thin layer of paint. Gradually attach the paper to the box, starting from one end to the other.
  8. Up-cycled Gift Box - cut out shapes and spread the glue on the box, carefully attach the paper
     
  9. Wait one minute for the glue to set slightly. Then, flip over the box and fold up all the seams. Wait another minute before putting the box back together. Trim off any excess paper. You may need to bend the seams again.
  10. Up-cycled Gift Box- allow the glue to set up
     
    Up-cycled Gift Box - trim off any excess
     
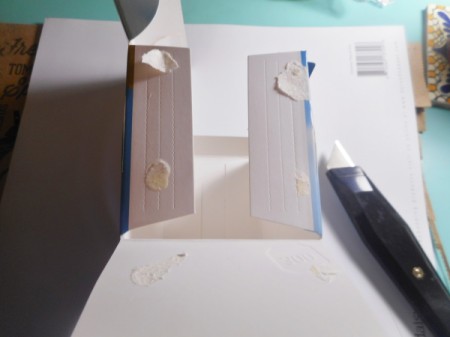
  11. Start putting the box together at one side. Apply a heavy layer of glue on the side panels and attach to the side wall. Flip the box to the side and set down paper weights to hold the panels down. Let dry 15-20 minutes before moving to the other side.
  12. Up-cycled Gift Box - reassemble
     
    Up-cycled Gift Box - use weights to hold the glued areas until the glue sets up
     
    Advertisement

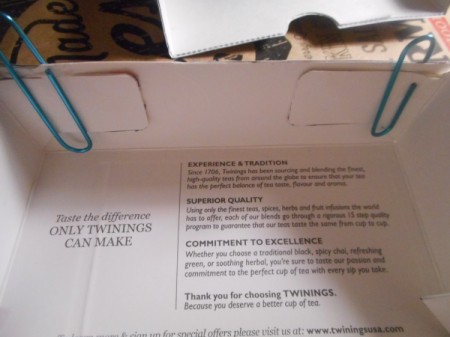
  13. Once both sides have dried and are secure, finish off the top part. You can use paperclips to clamp the panels to the roof of the box.
  14. Up-cycled Gift Box - use paper clips to clamp the sides to the top while the glue dries
     
  15. Let the box set up overnight before using it for gifting so your gift won't smell like glue, lol! It's also fun to include a few bags of tea from the original box.

    Note: A hot glue gun may also work for when you put the box back together.
Comment Pin it! Was this helpful? 2
Categories
Crafts PaperMarch 5, 2020
Pages
More
🎃
Halloween Ideas!
Instagram
Contests!
Newsletters
Ask a Question
Share a Post
Sub-Categories
AdviceBaking TipsBooksBoxing DayBudgetCardsCharitiesChristmas RecipesCleaningCooking TipsCraftsDecoratingDietingGamesGift WrappingGiftsHelpful HintsHosting TipsLinksMiscellaneousMy Frugal HolidayOrganizationParentingPartiesPhotosPlanningSanta TipsShoppingStocking StuffersTraditionsTravel
Published by ThriftyFun.
Desktop Page | View Mobile
Disclaimer | Privacy Policy | Contact Us
Generated 2022-10-12 16:14:35 in 5 secs. ⛅️️
© 1997-2022 by Cumuli, Inc. All Rights Reserved.
https://www.myfrugalchristmas.com/Make-an-Up-cycled-Gift-Box.html