social

Making Button Christmas Cards


Bronze Post Medal for All Time! 131 Posts
December 2, 2019

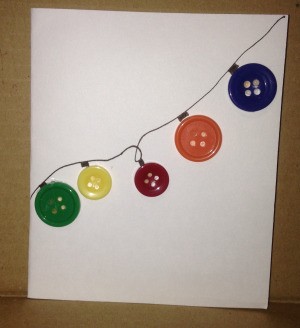
Button Christmas Cards - light strand card completedOne of my favorite parts of Christmas is decorating Christmas cards! This year, I found some button card ideas that were too adorable not to try. All of the ones I attempted were really easy to do and turned out great! I think even older kids would enjoy making these cards. A personal touch is always nice. I know I treasure and keep any card I receive, if I can tell someone spent time on it. My favorite of these is probably the dangling ornaments or strand of lights. I like the simplicity of only having the button decor on the front. Then I go crazy on the inside with the message and stickers!!

Advertisement

Total Time: 20 minutes

Yield: 5 cards

Supplies:
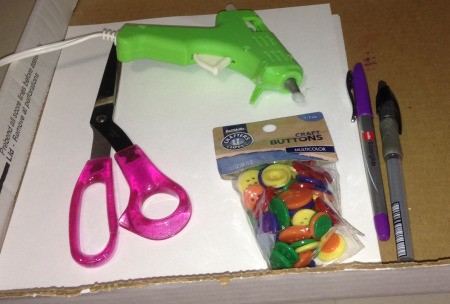
  • 2.5 pieces of white card stock
  • 30 buttons (what you consider Christmas colors)
  • glue gun
  • scissors
  • pen(s)
  • 2 short pieces of pipe cleaner
  • stickers, confetti, or other items to decorate the inside of the card.
Button Christmas Cards - supplies
 

Steps:

  1. Cut the card stock sheets in half. Then fold the half sheets in half. Trim any overlap to make the edges even.
  2. Button Christmas Cards - cut cardstock in half and fold in half, even up edges as needed
     
  3. For the "ho ho ho" card, simply write the "h" across the front of the card, three times, leaving a space between each for the "o"s.
    Hot glue a button to the right of each "h". Add any greetings inside that you choose.
  4. Button Christmas Cards - "h"s written across the front of the card, add a button for the "o"
     
    Button Christmas Cards - ho ho ho card complete
     
    Advertisement

  5. For the Christmas tree card, hot glue a layer of green buttons for the bottom of the tree. Then choose a different color for the garland. Use another level of green and garland. And finally two green buttons with a yellow above for the star.
    You can leave it as is or add a trunk. I used a pipe cleaner, but you can also draw one or use a brown button or paper.
  6. Button Christmas Cards - button tree without the trunk
     
    Button Christmas Cards - two strands of pipe cleaner for trunk glued in place
     
  7. For the ornament card, draw the metal hook pieces along the middle of the card. Hot glue a button under each hook piece.
  8. Button Christmas Cards - four ornament hooks drawn across the front of the card
     
    Button Christmas Cards - glue buttons in place right below
     
  9. For the dangling ornaments, hot glue the buttons first, randomly across. Then draw a straight line up from each button and add a bow.
  10. Button Christmas Cards - 4 buttons glued to the card, at alternating high and low positions
     
    Button Christmas Cards - draw a straight line down to the button and add a bow
     
    Advertisement

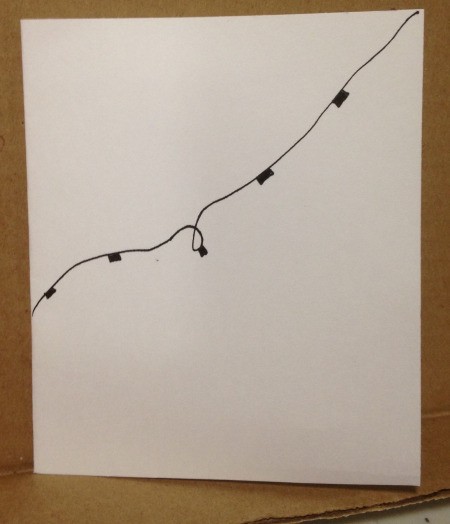
  11. For the light strand card, draw the strand and add the pieces where the lights attach. Then hot glue a button under each piece. The final version of this one is in the main photo.
  12. Button Christmas Cards - draw an electrical light strand with sockets
     
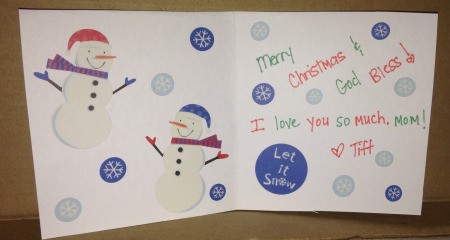
  13. Finally, you can write your Christmas/holiday message inside and add stickers, confetti, or anything festive!
  14. Button Christmas Cards - inside of the card with message and stickers
     
Comment Pin it! Was this helpful? 4

Comments

Read More Comments
Categories
Crafts CardsJanuary 14, 2020
Pages
More
🎃
Halloween Ideas!
Instagram
Contests!
Newsletters
Ask a Question
Share a Post
Sub-Categories
AdviceBaking TipsBooksBoxing DayBudgetCardsCharitiesChristmas RecipesCleaningCooking TipsCraftsDecoratingDietingGamesGift WrappingGiftsHelpful HintsHosting TipsLinksMiscellaneousMy Frugal HolidayOrganizationParentingPartiesPhotosPlanningSanta TipsShoppingStocking StuffersTraditionsTravel
Published by ThriftyFun.
Desktop Page | View Mobile
Disclaimer | Privacy Policy | Contact Us
Generated 2022-10-12 16:10:59 in 5 secs. ⛅️️
© 1997-2022 by Cumuli, Inc. All Rights Reserved.
https://www.myfrugalchristmas.com/Making-Button-Christmas-Cards.html