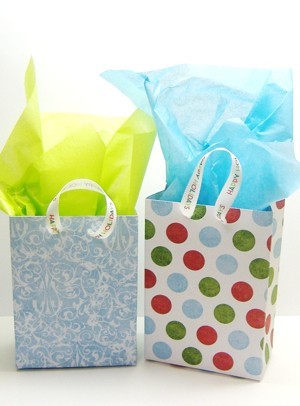
Approximate Time: 20-30 minutes
Cut out template and trace onto decorative paper.
Make folds and score with a bone folder.
To assemble bottom, fold short flaps, then the long flaps.
Apply tape or glue to secure the bottom.
Punch 2 holes to front and on the back top center of bag.
To make handles, thread the bag with a length of ribbon approximately 9 inches, then finish the ends with a knot.
Note: Wrap the gift in tissue paper before tucking it inside. Attach a gift tag.
Click Here for the Gift Bag Template.
By Maricel from Fairfax, VA

Add your voice! Click below to comment. ThriftyFun is powered by your wisdom!
From WiseGeek.com: A bone folder is a tool often used in paper crafts such as Japanese origami (artistic paperfolding), scrapbooking, and card-making. A classic bone folder is carved from real animal bones, often deer or elk. Bone is an ideal material for paper crafts because it is sturdy, smooth and grainless. Many bone folders are carved with ornate handles or other decorative features, but a basic bone folder is typically shaped like a wooden tongue depressor or a large popsicle stick. It may have rounded ends or a pointed end for working in corners.
Anita - Montclair, NJ
You should have step by step pictures. I know I'll never attempt this with these instructions.
Sounds great! I have lots of leftover gift wrap (the thick good quality kind) that I think would be great for this.
Add your voice! Click below to comment. ThriftyFun is powered by your wisdom!
By Syd Barr
A Computer Printer Craft:
I can supply the ideas and you can provide your talent. I experimented since I have an extra color printer and was willing to take a chance since I only paid $20.00 at Salvation Army for it, to try this craft project. The paper bag feeds through the printer fine on the envelope setting, since it is a little thicker.
I Used white 8 lb. Kevin 08126A lunch type bags, 12-1/2 inches long by 6 inches wide (bought at B.J.'s Warehouse store). Between scanning old cards, using Print Master program, and letting my imagination take over, made cute individual gift bags. They can be personalized with a photo; how ever you want. You do have to play with it and make adjustments ... practice makes perfect! I kept printing on scrap paper in black until I had the design situated on the bag ... less is best. The first one takes time until you get the hang of it.
I used this for a gag birthday gift. I printed the bag with, "You woke up this morning. Congratulations. You have another chance!" and put a small border around it. Your printing area is limited to about 6". Fold the top down and reinforce with card stock strips glued between the fold down top area. Add rope cording handles.
Tip: Without opening the bag, with the flat bottom on the table, slide your hand in the bag to make another bottom that can be glued to the existing flat bottom. Glue the bottoms together. This will help in centering your design on the bag. I'm sure you can figure it out!
I just wanted to let everyone know that it can be done. I would not use my main printer, use an old one you don't care about. Have fun!
- Syd Barr
~ ~ ~
About The Author: Syd Barr is a long time reader and contributor to The Coupon Clipper and other Thrifty Fun newsletters. Thanks Syd!