Julie
Bronze Feedback Medal for All Time! 149 Feedbacks Approximate Time: 30 minutes

Supplies:
- any type wooden plank any size
- acrylic paints
- textured snow paint
- black craft wire
- old buttons
- black permanent marker for detailing
- 2 red felt triangles for his hat
- tiny bell if desired for his hats end
- paint brushes assorted sizes*
* I use a flat brush for painting and a liner brush for tiny detailing and the back of the liner brushes end for dotting the eyes as pupils
Instructions:
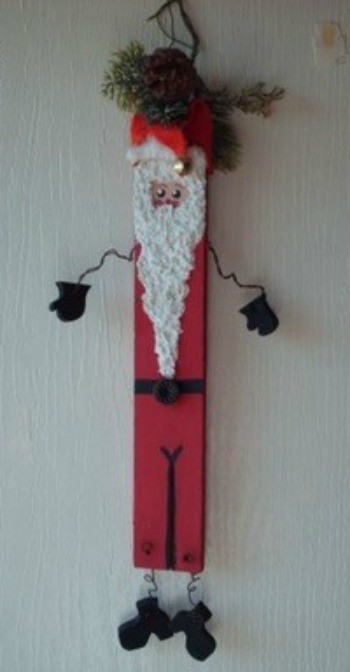
Choose your wood source of any size you like. Cut your wooden mittens and boots from scrap wood pieces make them the size needed to match your wooden Santa's body.
- Paint his body red first, let dry.
- Paint the top end of the plank, just far enough down in a flesh color to be his face and let dry.
- Then paint on his eyes with 2 white dots oval shaped. This can be done using the wooden end of the liner brush just by dotting on the eye in white paint then slowly dragging that circle down and lift up to form an oval shape, let dry, then use the end of your liner brush again with black paint to add his pupils which will be in the bottom inside corners just like you did with the white of his eyes.
- Add 2 pink dots for his rosy colored checks and a red nose also using your liner brush end to dot.
- Now use your white textured snow paint for his beard by simply stenciling it on with a stencil brush in the shape of a long pointed down triangle around his face.
- Let dry good; then take your 2 pieces of red felt triangle shapes and hot glue to the top of his wooden plank just barely overlapping his eye brows hot glue one to each side the front and back, then glue the tip together with hot glue then fold your hat over just a bit and hot glue there underneath. At this point you can glue on a white cotton ball or tiny bell to his hats end.
- Then drill a tiny hole on the top sides, arm sides, and bottom for his wires to be placed. Run your wire through the mittens and boots that you also drilled a tiny hole through and run them through the places on the plank.
- Use a black marker to add any detail that you like such as his inseam to his pants, his belt, etc.
- Hot glue on old buttons to his coat to add interest.
- If this will be outside put on 2 coats of spray clear coat.
Hang anywhere to enjoy. The little feet and mittens will dangle from the wires end and the bell will jingle from his hat. I also twisted around a pine cone and greenery pick to his wire at the top for interest but that is optional.
By Julie from TN
Add your voice! Click below to comment. ThriftyFun is powered by your wisdom!

Ruth Kennedy
Bronze Feedback Medal for All Time! 174 Feedbacks December 11, 20080 found this helpful
cute idea...I think I can do it...am going to try it and if not for this Christmas might be able to do it for next year
thanks for sharing Ruth

September 28, 20200 found this helpful
super cute I hope I can do it, the little gloves and boots might be my biggest challenge. Thanks for sharing and wish me luck.
lw
Add your voice! Click below to comment. ThriftyFun is powered by your wisdom!

