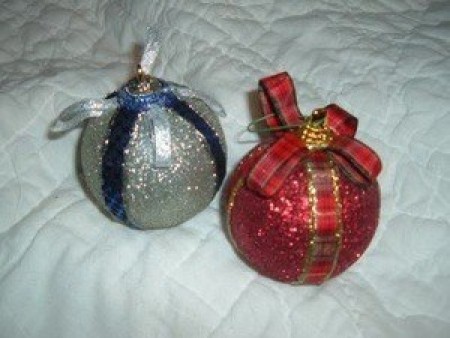
I found 25 of each silver and gold glitter balls in a bag at the Salvation Army in Tucson, AZ. If you can't find something similar, don't worry. Sometimes you can find them covered in shiny surfaces, and you can add your own touches.
Approximate Time: 20-30 minutes
These came with a top and hanger, so that made things easier. I could literally hang them up and work on them, but I also had a craft vice that helps keep things in place. If you don't have one of those, don't worry. Sometimes a coffee mug that keeps it snug can be perfect. Or, since they are Styrofoam, you can stick a darning needle in each side (like you do an avocado pit and toothpicks) and work on it that way.
For the silver, I chose blue, but green sometimes looks nice, too. For gold, it's got to be red (but that's just me)! You can use any colors you want. Pick your ribbon, and decide if you want to do the ball in halves or thirds. In other words, do you need two strips or three. I chose two because you can't see the backs of ornaments, so why waste the time and fabric. But again, that's just me.
Measure how long you need each one, and glue (not diluted this time) the ribbons around the ball. Sometimes glue is slick, and gravity works against you. You come back and find that the ribbon has slid and then the glue dried, and there you are. So, you can put a couple of straight pins at the top of each strip right next to the hanger/top, and one in the "cross" where they overlap at the bottom. That will secure things till they dry.
Once dried, get the glitter glue that you want to use and make a "border" of each side of the ribbon. This not only makes it look nicer, but covers any unraveled threads if you choose to use fabric and not ribbon. Let that dry. I used ribbon for embellishments, but they don't store very well. If I ever make these again, I will simply make a design with the glitter of the same or different color.
If the balls you find don't have hangers, simply unbend a paperclip, flex it back and forth till it breaks in two. Stick the broken end deep in the top, and glue it in place.
Variations: If you want another effect, simply drop glitter all over the tops (let dry so it doesn't run) and then turn over and do the bottom. You can also glue on faux gems, or simply insert pearescent hat pins.
By Sandra from Salem, OR

Add your voice! Click below to comment. ThriftyFun is powered by your wisdom!